
By Annie Heil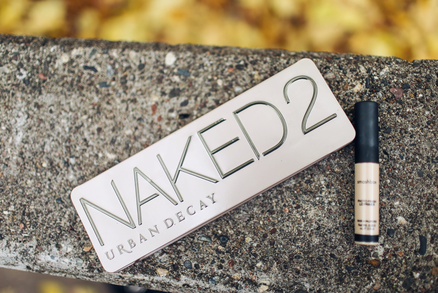 I don’t know what it is about eye shadow, but out of all the makeup products in the world eye shadow is by far my favorite one to apply. From dark smoky eyes to light shimmery neutrals, the possibilities are endless when it comes to creating eye shadow looks and it makes experimenting with various colors and palettes a ton of fun. In fact, over the years I have probably spent far too many hours trying out different color combinations and looks with numerous palettes. It was totally worth it in the end though because I have finally mastered my go-to everyday eye shadow look. That is why today, I decided I would spare you all some time and share with you exactly how I accomplish it! First things first, lets clarify where the common eye shadow placement terms are located on the eye. Below, I attached a detailed chart of what part of the eye I am talking about when I refer to places such as the “crease, tear duct and outer v”. I know when I first looked at an eye shadow tutorial online I was horrendously confused so if any of the terms I say don’t make sense refer back to this helpful little chart. :) 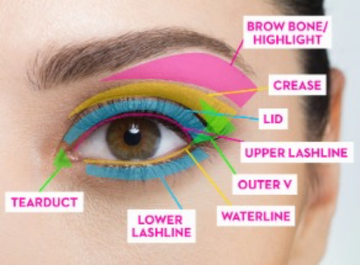 Now, lets begin! Before applying any eye shadow I would highly recommend using a primer. This ensures your eye shadow stays on all day and doesn’t smear or wrinkle when you blink. I use Smashbox Photo Finish Lid Primer, but any brand of primer works. If you don’t feel like purchasing a primer, you can use a little bit of your under eye cover-up or concealer and apply it all over your lid and lower lash line with your finger instead. 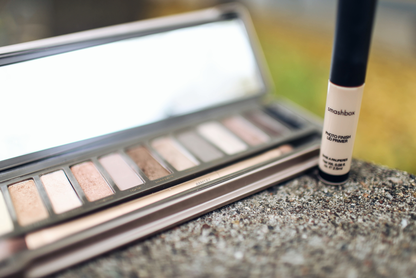 Next I took a pale yellow-toned matte shade and applied it all over my lid as a base color. For this particular look, I used the Urban Decay Naked 2 palette but any eye shadow palette with natural colors will work as a substitute. After applying the base color, Foxy, with an all over eye shadow brush take a shimmery golden bronze color, I used Half Baked, and apply this all over the lid as well. For more definition, I used Chopper from the Naked 2 palette and applied a light coat of the shimmery copper shade with silver micro-glitter to the lid as well.  On a large blending brush I took the color Tease, a creamy pale brown matte color and buffed it into the crease using windshield wiper motions. On a precision eye shadow brush, I took a dark bronze shimmer shade called Snakebite and continued buffing this into the crease and along the lower lash line to frame my eyes. I then applied Bootycall, a light shimmery pink into the tear duct and under the brow bone to highlight. Lastly, with a gel eyeliner or angled brush I took the shade Busted, a deep brown shimmer color, and applied this along the upper lash line as mock eyeliner and into the outer v. 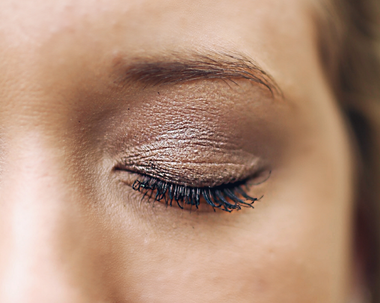 Finally, apply your favorite mascara and voila! You officially have a stunning eye shadow look that is perfect for everyday wear. And the best thing about this look is after you get the hang of the sequence it can easily be accomplished in less than five minutes. A gorgeous eye shadow tutorial that is fast, simple AND stress-free, what more could you ask for! Xo, Annie 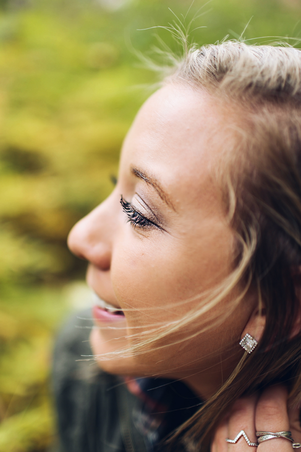
0 Comments
|

Meet Abby!Abby is a passionate and fashion forward Twin Cities native majoring in Retail Merchandising here at the University of Minnesota. She loves to capture the beautiful small moments in life with her camera. You’ll probably find Abby sipping on a latte whilst adventuring in the city or curled up in bed with a good book! Check her out on the "beauty" section of Twin! Categories
All
|
