By Annie Heil PC: Anne Paoletti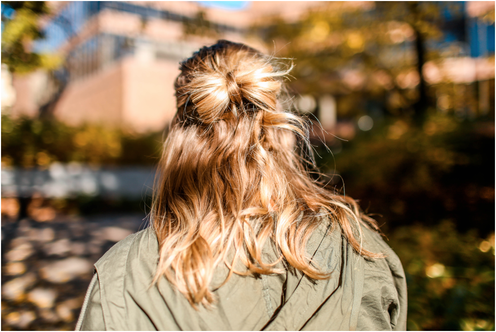 The first time I came across a hair bow I was immediately intrigued. When I say hair bow though I’m not talking about the stereotypical huge hair bows cheerleaders wear or the tiny colorful ones moms will put in their daughters hair. Rather, I’m talking about an updated, sleek and sophisticated type of hair bow that will turn heads wherever you go. That’s right, I’m talking about a hair bow made out of hair. I mean, come on, you really can’t look at this hairstyle without immediately wanting to attempt it. Using only and elastic and bobby pins to hold down each of the two sections of the bow, this hairstyle looks a lot more difficult to recreate than it actually is. To find out just how easy it is, keep reading! 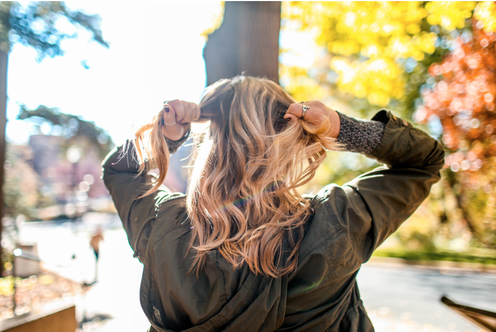 Step 1: Begin by grabbing two even sections of hair just above your ears and pull them to the back of your head. Secure with a hair band elastic and create a small half-bun in the center of your head by not pulling the hair entirely through on the last twist of the elastic. 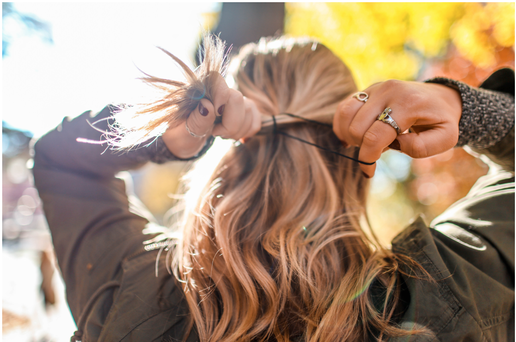 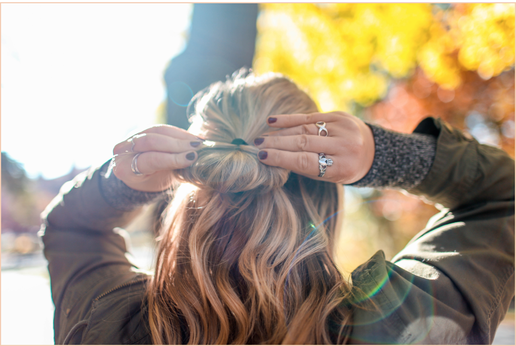 Step 2: Next, evenly divide the small half bun down the middle into two separate sections. These will turn into the shape of the bow. Fluff out one of the sections from the half bun and twist it down and to the right to separate and add volume. Secure the hair down to your head using a bobby pin. 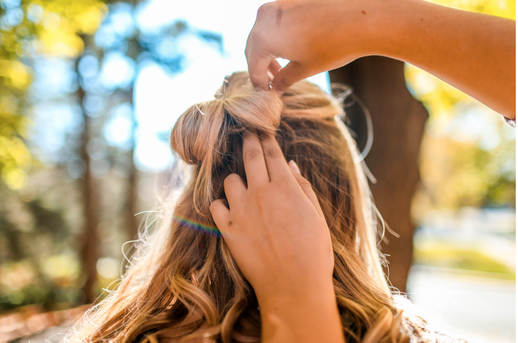 Step 3: Repeat this with the second section of the hair bun to create the other side of the bow. Again, use a bobby pin to secure the hair down and make sure you are camouflaging the bobby pin by putting it on the hair inside each side of the “bow”. 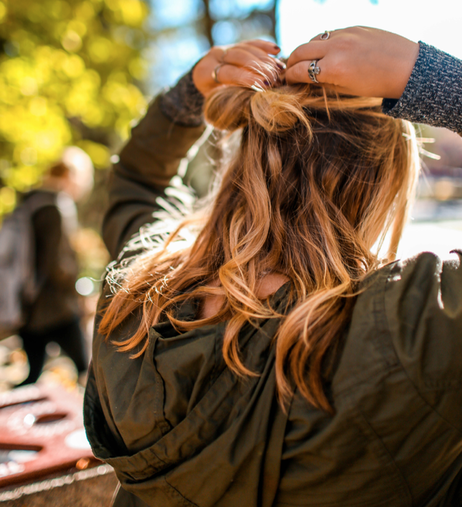 Step 4: Lastly, use some of the remaining hair underneath your bow to mask the hair elastic in the middle. Pull a small piece through a hole in your crown and tuck it in using a bobby pin. If your hair is long enough, go ahead and flip out the remaining ends from the piece of hair hiding the elastic to really add some detail into your bow. 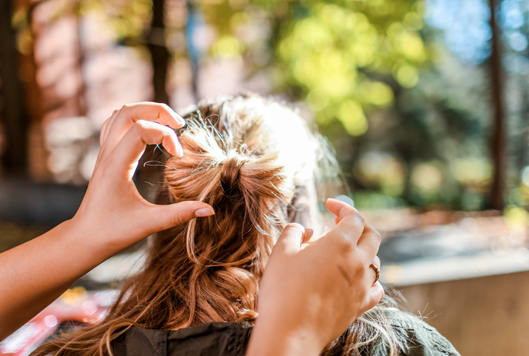 And there you have it ladies! In just four short steps your innovative and (literally) priceless hair bow is officially complete. Now go out and rock a hairstyle even Sir Mix A Lot “can’t stop staring” at. :) Xo, Annie
0 Comments
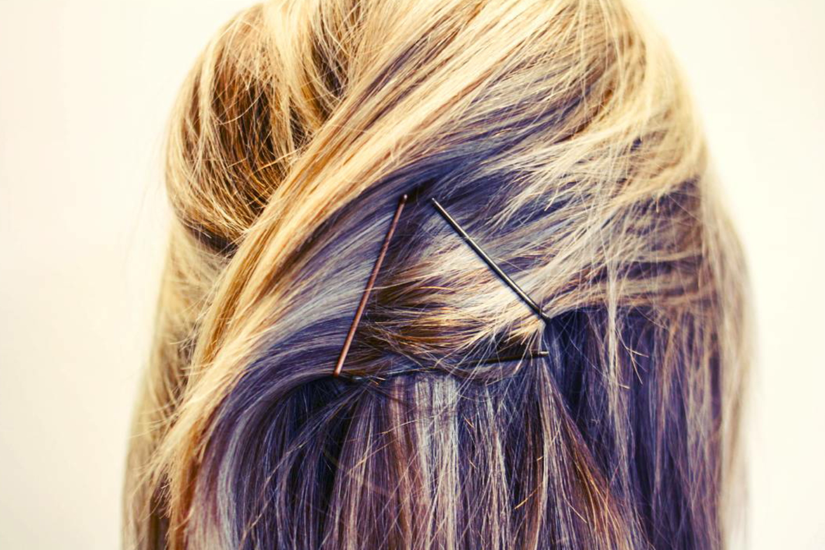
By Annie HeilWhat if Jay Z wrote about lost bobby pins instead of a quote on quote girl who isn’t his problem? The song probably wouldn’t have been as popular as the original, but I must say I’m curious to know what the rest of the lyrics would be. “If you having bad hair days I feel bad for you son”, or “if you don’t like my hair you can say goodbye”? Oh gosh, okay maybe I don’t want to know the lyrics to a bobby pin song…stick to writing about girls Jay Z. Using bobby pins to accessorize is a very overlooked opportunity. I can’t even begin to tell you how many I’ve lost over the years and I swear sometimes they grow legs and walk away. However, on the rare occasion I find more than two lying around I immediately turn to my three absolute favorite bobby pin hairstyles. 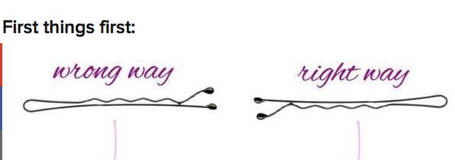 I know it may sound ridiculous but a lot of people don’t know the proper way to use a bobby pin. The jagged side faces DOWN, never vice versa! Additionally, if you’re planning on wearing your hairstyle for a long period of time try spraying them with dry shampoo or hairspray beforehand. This adds friction and holds the bobby pin securely in place when the product dries. 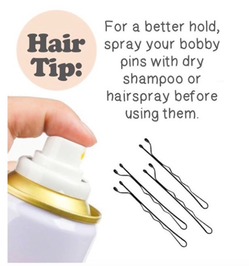 #Hashtag: Social media babes this hairstyle is for you. It closely resembles a hashtag and it is a cute way to keep your front hair out of you face. Depending on where you part you hair, take two small sections and secure them with two horizontal bobby pins placed parallel to each other. Next, take two more and secure them vertically to create the hashtag. Make sure the pins are equally spaced apart to resemble the shape as much as possible and when inserting the horizontal pins, pull them away from your face. When inserting the two vertical pins, pull upwards.  Chevron: The second hairstyle is perfect if you’re looking to spice up a simple low bun, ponytail or even a side braid. I wear my hair in a low bun all the time so for this look I began by sweeping all my hair to the nape of my neck and tying it in a low messy bun. Then I took two bobby pins and placed them in the shape of a “V”, making four rows. To position the pins in your hair a little easier, make sure to always insert them diagonally down towards the floor. The two ends of the pins should always connect for the “V’s” to stay in place and create the chevron pattern down your head. 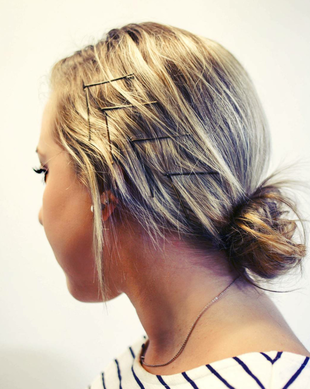 Triangle: The third and final look is a chic bobby pin triangle designed to hold back a half updo. This one is perfect for those days when you’re torn between spending time on your hair or just throwing it up and out of your face. Personally, I struggle with this on the daily so I adore this look. If you have a lot or very long hair, first secure hair from one side with a bobby pin and hide it under the hair from the other side. Then you can go ahead and create the triangle. This can get tricky, but I found it’s easiest to secure the bottom pin first then diagonally insert the two sides of the triangle down towards the floor. Just make sure the ends are always touching, otherwise your triangle will end up looking more like random chicken scratches!
Feeling adventurous? Try creating these looks with different colored bobby pins and have a blast “pinning”! :)
Xo, Annie |

Meet Abby!Abby is a passionate and fashion forward Twin Cities native majoring in Retail Merchandising here at the University of Minnesota. She loves to capture the beautiful small moments in life with her camera. You’ll probably find Abby sipping on a latte whilst adventuring in the city or curled up in bed with a good book! Check her out on the "beauty" section of Twin! Categories
All
|